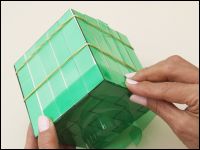
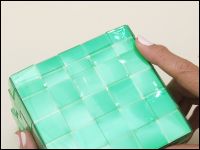
10. Weave with the ribbon around the
whole mold.
|
11. After doing that, you will need to
"hide" the remaining portion of the ribbon you are working with under
the already fixed ribbons (warp). This is made passing just normally
weaving the remaining portion (over the already woven part) along
approximately four more positions. In the last position, the ribbon
must be under the fixed ribbon, thus hidden. Cut the ribbon at the
point.
|
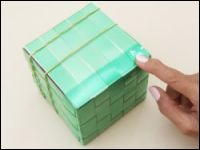
12. Repeat steps 9 to 11 with another
three ribbons. One ribbon will remain unused for now.
|
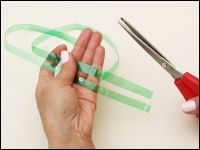
13. Take the remaining ribbon and cut it
in two, longitudinally.
|
14. Weave normally with these narrower
ribbons.
|
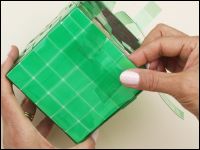
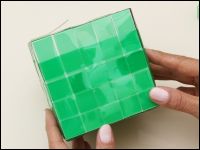
15. When the sides of the box are ready,
it's time to deal with the vertical ribbons sticking from the laterals.
Fold the ribbons that are passing under the warp towards the outside of
the box.
|
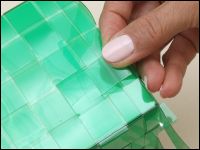
16. Cut the ribbons at the point in
which they meet the fourth position of the warp (top-down). Then incase
their tips under the third ribbon of the warp.
Remove the mold from the PET box and. Fold the remaining ribbon tips
towards the inside of the box. Cut them at the point in which they meet
the fourth position of the warp (top-down), then incase them in the
warp.
|
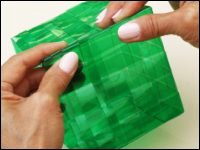
17. Use the pliers to strenghten all the
folds of the box. If needed, protect the box with a piece of PET while
doing so.
|

18. And this is the finished box. The
technique used in it can be applied to many other types of PET
products, such as folders, pencil cases and bags.
|